The Gift|Calendar page specifies which roles have access to the gifts and for how long. You can modify the calendar information if you have the appropriate permissions.
To add a calendar entry, complete the following:
- Open the Funds Management application from the AudienceView Desktop.
- Select the Gifts tab.
The Gifts|Search page appears.
- Search for and select the gift that you want to add a calendar entry to. For more information, refer to the Funds Management Gifts-Search Page and Performing Searches.
The Gifts|Details page appears.
- Select the Calendar tab
The Gifts|Calendar page appears.
- Click 'Add Entry'.
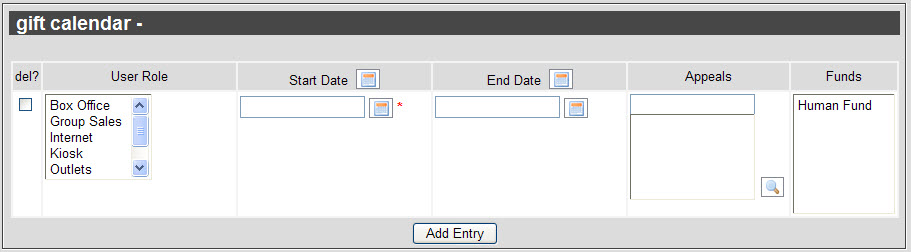
A blank calendar entry will display, as illustrated in the image above.
- Complete the following fields:
- Select one or more roles from the Roles list which you want to enable access to the fund.
To select more than one user role, hold CTRL or SHIFT while making your selections.
- Enter the date from which the gift will be available to the role in the 'Start Date' field or select a date by clicking
 next to the field.
For more information, refer to Using a Calendar to Add a Date.
- Optionally, enter a date when the gift will no longer be available to the role in the 'End Date' field or select a date by clicking next to the field.
For more information, refer to Using a Calendar to Add a Date.
- Enter the appeal that you want to associate the gift with in the 'Appeals' field or click
 to search for the appeal.
For more information, refer to The Find Appeals Dialog Box.
- Select the fund that you want to associate the gift with from the 'Funds' field.
- For each role that you want to define, repeat the process from Step 5.
- Click 'Apply'.
A window confirms that the application updated the gift.
- Click 'OK'.