 |
Warning
Facebook has discontinued support for the Like Box widget and it should not be used. It has been completely removed in AudienceView 6.8.8.
Instead, use the Facebook Like Button widget. |
|
|
Warning
Do not insert widgets within the form of an article. An error will cause the article to not appear Online. |
 |
Hint
If you have not yet published a Facebook page or you have placed demographic restrictions on the page (e.g. a specific country, age of majority, legal drinking age) the Like box will not display if users are not logged into Facebook. |
Before you can insert the Facebook Like button to a site or article, you must ensure that Facebook is selected from the Content Management application Sites|Applications page's 'Application' field.
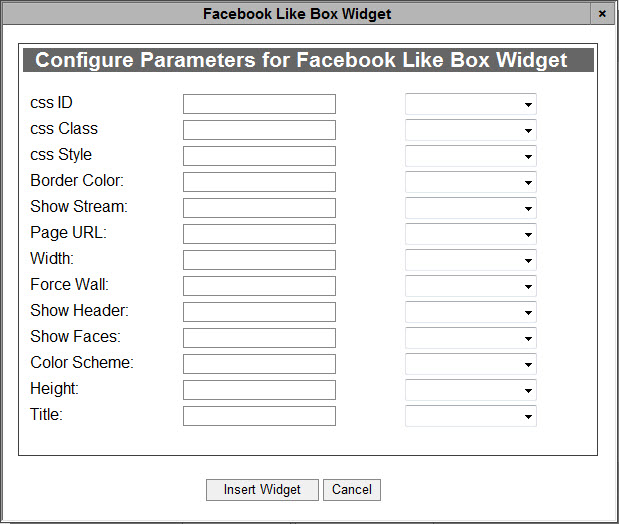
To build and insert the Facebook Like Box Widget, complete the following:
-
Open the Content Management application from the AudienceView Desktop.
-
Select the Articles tab.
The Articles|Search page appears.
-
Search for and select the article that you want to work with. For more information, refer to Content Management - Articles|Search Page and Performing Searches.
The Articles|Basic page appears.
-
Select the Text tab.
The Articles|Text page appears.
-
Click 'Insert Widget'.
-
Select Facebook Like Box Widget from the dropdown.
-
Complete the following fields:
-
css ID: Enter any applicable CSS ID information (with no spaces) in this field.
-
css Class: Enter any applicable CSS class information (with no spaces) in this field.
-
css Style: Enter any applicable CSS styles that you want to apply to the Facebook Like Box widget (e.g. background:blue,color:white).
For more information, refer to AudienceView Branding Guide.
-
Border Color: Determines whether or not the border is displayed around the Like box. This is set to true, by default.
-
Show Stream: Determines whether or not to display a stream of the latest posts by the page. This is set to true, by default.
-
Page URL: Enter/paste the URL of the page that you want to the button to refer to.
-
Width: The width of the Like box defined in pixels.
-
Force Wall: Determines whether or not to the stream contains posts by the Page or just check-ins from friends (this works for pages that have a physical location that can be used with check-ins).
-
Show Header: Determines whether or not the Facebook header is displayed at the top of the Like box. This is set to true, by default.
-
Show Faces: Specifies whether to display profile photos below the button (standard layout only).
-
Color Scheme: Enter the colour scheme that you want to use for the button. There are two options:
-
Height: The height of the Like box in pixels.
The default height varies depending on number of faces that are displayed, and whether the 'Stream' is displayed.
When 'Show Stream' and 'Show Faces' (10 photos) are set to true, the default height is 556.
When 'Show Stream' and 'Show Faces' (10 photos) are set to false, the default height is 63.
-
Title: Enter the name that you want to appear for the Like box.
For information regarding the 'Context Type' dropdowns that appear next to each of the parameter fields, refer to Using Context Types for Widget Parameters.
-
Click 'Insert Widget'.
The Facebook Like Box widget is inserted in the article text.
-
Click 'Apply'
A window confirms that the application updated the article.
-
Click 'OK'.
|
|
Hint
To change any of the labels that appear in the Configure Parameters for Facebook Like Box Widget dialog box, navigate to the Registry application Registry::EN::Application::Content Management::Widgets::Facebook Like Box Widget node. |