 |
Warning
Do not insert widgets within the form of an article. An error will cause the article to not appear Online. |
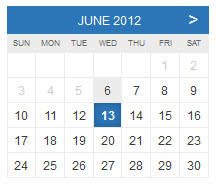
The following image illustrates what the Calendar Widget will look like in AudienceView Online:
To allow Online users to select dates from the calendar widget, the searchPerformanceDays permission must be enabled for the TSContentBO for the WebSales and Anonymous WebSales user/group.
To insert the Calendar Widget, complete the following:
-
Open the Content Management application from the AudienceView Desktop.
-
Select the Articles tab.
The Articles|Search page appears.
-
Search for and select the article that you want to work with. For more information, refer to Content Management - Articles|Search Page and Performing Searches.
The Articles|Basic page appears.
-
Select the Text tab.
The Articles|Text page appears.
-
Click 'Insert Widget'.
-
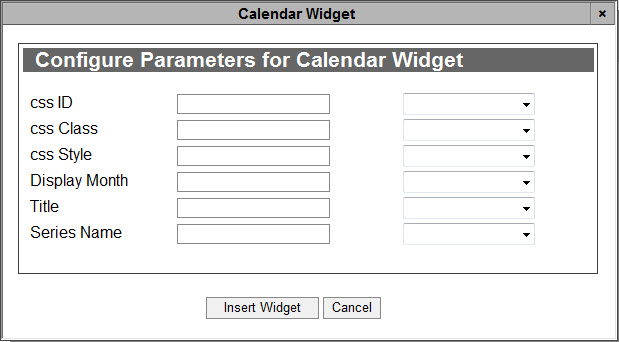
Select Calendar Widget from the dropdown.
The Calendar Widget dialog box appears:
-
Complete the following fields:
-
Click 'Insert Widget'.
The Calendar widget is inserted in the article text.
-
Click 'Apply'
A window confirms that the application updated the article.
-
Click 'OK'.
 |
Hint
To change any of the labels that appear in the Configure Parameters for Calendar Widget dialog box, navigate to the Registry application Registry::EN::Application::Content Management::Widgets::Calendar Widget node. |