Selecting Seats
To select a seat:
-
Select the desired price type from the 'Price Types' dropdown list.
-
Click the desired seat.
A black letter over the seat indicates that it has been selected, along with the price type applied to it.
Cancelling a Selection
To cancel a seat selection:
-
Hold down the SHIFT key and click the seat.
The price type letter will be removed.
-
Click 'Update Changes' or 'Order Summary' to update the order.
 |
Information
The Selection section at the top of the page lists how many seats you have selected. |
Selecting Multiple Seats
To select multiple seats at a time:
-
Press and hold down the mouse button over a desired seat and then drag the cursor over any other seats you'd like to select.
-
Press the mouse button on the map next to, but not directly on, the seats that you want to select. Holding your mouse button down, drag the mouse to lasso the seats you want to select. Only seats that are completely within the lasso are selected when you release the mouse button.
-
Pressing and holding the SHIFT key and the mouse button while dragging the cursor over selected seats will cancel the seat selections.
Changing the Price Type for a Selected Seat
To change the price type of a seat that has already been selected:
-
Select the new price type from the 'Price Types' dropdown list.
-
Click on the previously selected seat to replace the price type.
-
Click 'Update Changes' or 'Order Summary' to update the order.
Zooming In and Out of Maps
Seat Maps are created using SVG (Scalable Vector Graphics). SVG enables you to zoom in and out of the image without losing any image quality.
-
To Zoom In: Move your mouse over the area that you want to zoom into, press CTRL and click the left mouse button.
-
To Zoom Out: Press CTRL+SHIFT and click the left mouse button.
Navigating Venues Maps with Multiple Screens
 |
Information
If the Full Map view is selected then the magnifying glass icon will not display on the map. |
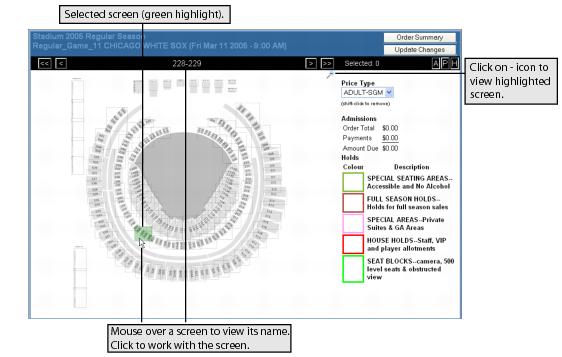
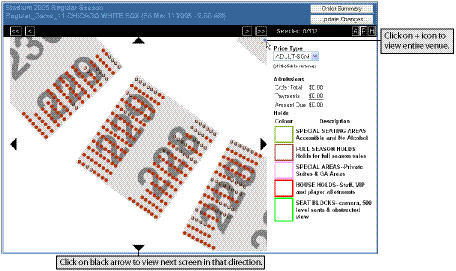
Large venues that cannot easily display in a single image are divided into smaller images called screens. A magnifying glass (  ) icon located at the top right corner of the venue map is used to toggle between the entire venue and single screen images:
-
To view the entire venue, click
 .
.
-
To view the seats for a part of a screen within the venue map, click the screen.

If enabled by your system administrator, arrows at each side of a single screen image enable you to get to the next closest screen (that is above, below, left or right). If a black arrow is present and you want to see the next screen in that direction, click on it.

Viewing Sold Seat Details
To view the details of a sold seat, double-click the seat. The seat details window displays the following information:
-
Order number: You can click the number to view the order details.
-
Customer numbers: You can click the number to view the customer details.
-
Contact
-
Address details
-
Assigned customer number and name (if any is assigned)
 |
Hint
If you have the venue map open for more than one performance, you can scroll through the seat details for all the selected performances by using the '<< Previous' and 'Next >>' buttons. |