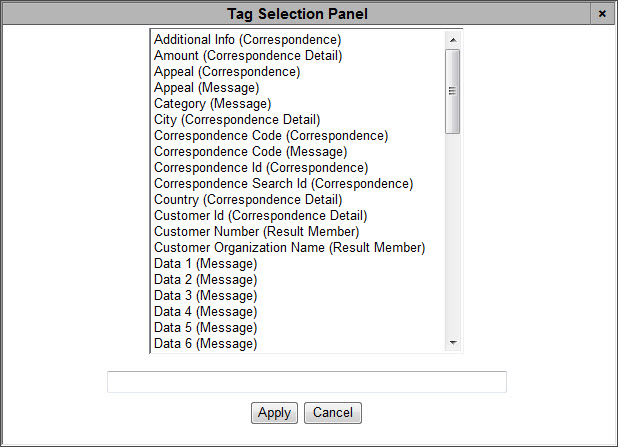
You can customize messages with tags. Tags are placeholders for specific, stored information about the message recipient and behave similarly to the mail merge functionality in Microsoft Word. By adding tags, the message will contain personalized information relevant to the recipient. For example, you can customize the message so that the salutation includes the recipient's name (e.g. "Hello, Margaret Fisher").
When selecting tags from the Tag Selection Panel selection box, the tags are listed in the format of:
The five available sources for tags are:
-
Correspondences: Taken from the associated correspondence record's basic information
-
Correspondence Detail: Taken from the detailed information of the associated correspondence record
-
Message: Taken from the details of the message content
-
Schedule: Taken from the sending schedule for the message
-
Result Member: Taken from the Business Intelligence and Reports application Business Intelligence|Results page of the BI Query that has been selected in the Correspondence application Message|Basic page 'Send To' field.
 |
Information
Only tags that contain (Correspondence) in their names will be displayed in Internal messages. |
For example, the tag for the first name of the recipient is:
-
'First Name (Correspondence Detail)'
In the above example, the first name of the recipient is taken from the Correspondence Detail associated to the customer.
To insert tags into your message, complete the following:
-
Open the Correspondence application from the AudienceView Desktop.
-
Select the Messages tab.
The Messages|Search page appears.
-
Select the Build tab.
The Messages|Build page appears.
-
Place the cursor where you want to insert the tag.
-
Click 'Insert Tags'.
The Tag Selection Panel selection box appears.

-
Enter the name of the tag in the search field at the bottom of the dialog box.
The list oftags narrows.
-
Select the tag that you want to insert.
-
Click 'Apply'.
The tag is inserted in the message.
-
For every tag that you want to add, complete the process from Step 4.
-
Click 'Apply'.
A window confirms that the application updated the message.
-
Click 'OK'.
 |
Caution
You cannot use a background colour with tags. Doing so will cause an XML validation error. |