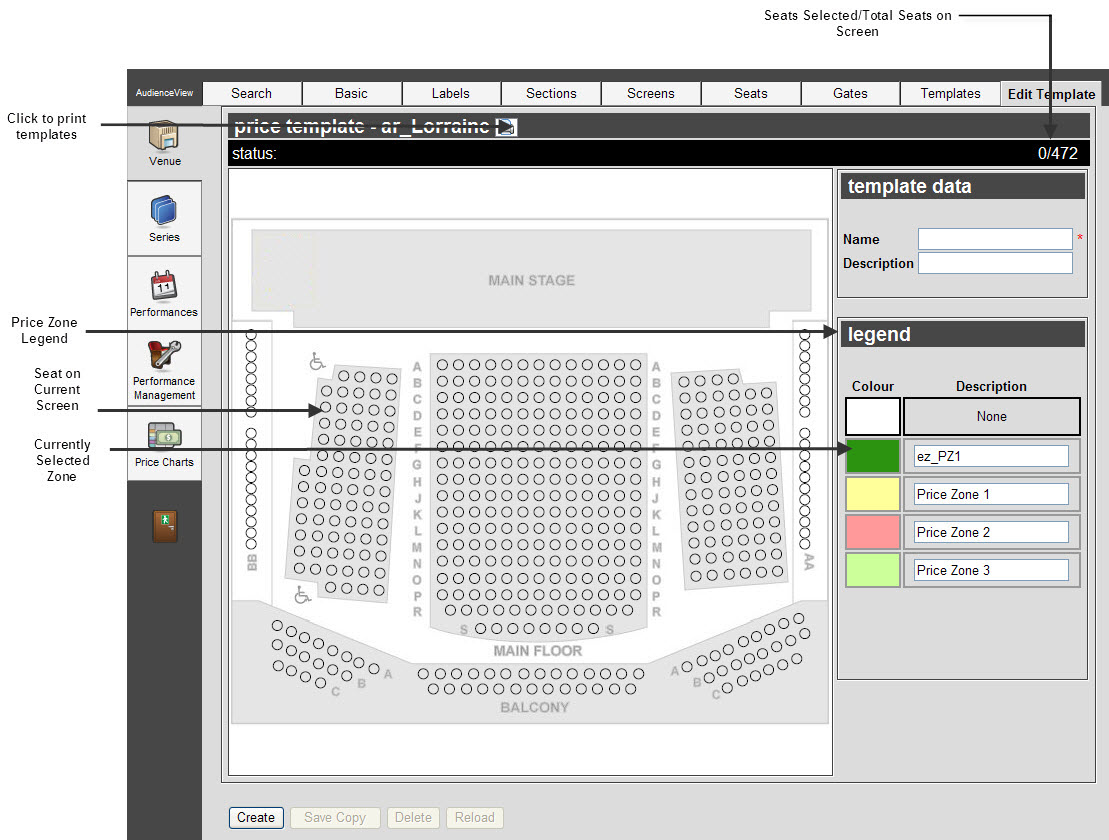
You can create venue template to be applied to single or multi-screen venues. The following sections discuss how to perform both types of templates.
- Open the Venue Configuration application from the AudienceView Desktop.
The Venue|Search page appears.
- Search for and select the venue that you want to work with. For more information, refer to the Venue Configuration Venue-Search Page and Performing Searches.
The Venue|Basic page appears.
- Select the Template tab.
The Venue|Templates page appears.
- Click 'New Price Template', 'New Hold Template' or 'New Fill Template'.
The Venue|Edit Template page appears.

The seats are initially transparent. The legend area displays the available price zone, hold type or fill zone (depending on the template type) along with its representative colour. These legends were created in the Legends application.
For more information, refer to Legends Application.
- In the template data section, enter the name of the new template in the 'Name' field.
- Optionally, enter a brief description in the 'Description' field.
If you want certain seats to be unavailable to all of your ticket sellers, you can either not give them a price zone (using the None legend), or you assign them a hold type to which none of your ticket sellers has access.
- In the legend section, select the legend that you want to work with.
- Click and drag the mouse over the desired seats. When you release the mouse button, the seats will be coloured according to the selected legend. If you coloured a seat in error, select the desired legend and recolour the seat.
- Optionally, in the legend area, enter a new name for the price zone, hold type or best available level (depending on the type of template) in the available field.
- For each zone to be used for this venue, repeat the process from Step 7.
If there are additional screens for the venue, use the arrows at the edges of the current screen to browse to the other screens.
- Click 'Create'.
If you did not assign a price zone, hold type or best available level to a seat, a window prompts you to confirm the save.
- Click 'OK'.
A window confirms that the application created the template.
- Click 'OK'.