 |
Warning
Do not insert widgets within the form of an article. An error will cause the article to not appear Online. |
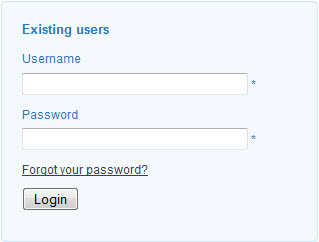
The following image illustrates what the Login Widget will look like in AudienceView Online:

For more information about branding, refer to Default Login Branding in the AudienceView Branding Guide.
To build and insert the Login Widget, complete the following:
- Open the Content Management application from the AudienceView Desktop.
- Select the Articles tab.
The Articles|Search page appears.
- Search for and select the article that you want to work with. For more information, refer to Content Management Articles-Search Page and Performing Searches.
The Articles|Basic page appears.
- Select the Text tab.
The Articles|Text page appears.
- Click 'Insert Widget'.
- Select Login Widget from the dropdown.
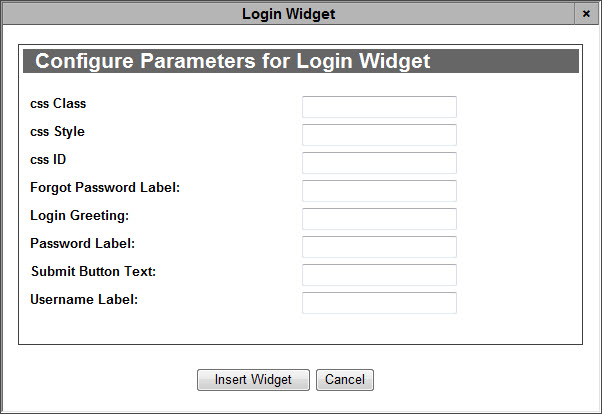
The Login Widget dialog box appears:

- Complete the following fields:
- css Class: Enter any applicable CSS class information (with no spaces) in this field.
- css ID: Enter any applicable CSS ID information (with no spaces) in this field.
- css Style: Enter any applicable CSS styles that you want to apply to the login widget (e.g. background:blue,color:white).
For more information, refer to AudienceView Branding Guide.
 |
Caution
If you do not enter any information in the fields below, they will be blank Online. |
- Forgot Password Label: Enter the text that you want to appear on the Forgot Password link.
- Login Greeting: Enter the text that you want to appear when the customer logs in.
- Password Label: Enter the text that you want to appear next to the 'Password' field.
- Submit Button Text: Enter the text that you want to appear on the 'Submit' button.
- Username Label: Enter the text that you want to appear next to the 'Username' field.
- Click 'Insert Widget'.
The login widget is inserted in the article text.
- Click 'Apply'
A window confirms that the application updated the article.
- Click 'OK'.
 |
Hint
To change any of the labels that appear in the Configure Parameters for Login Widget dialog box, navigate to the Registry application Registry::EN::Application::Content Management::Widgets::Login Widget node. |